How do I move items from "My Workspace" in Microsoft Fabric?
- Matt Collins
- Oct 25, 2024
- 4 min read
Workarounds and guidance when Fabric Deployment Pipelines aren't available.
A common issue I've seen recently when working with Microsoft Fabric is managing items in the "My Workspace" Workspace. This is often the playground for many users who sign up for a free trial but can result in some administrative overhead when resources developed here are now ready for wider use and need to be moved to a shared location.
In this article we will discuss how to move workspace items in Microsoft Fabric from "My Workspace" to other workspaces, using our understanding of item dependencies and some metadata to speed up the process.
The problem
Consider the following scenario. You're a citizen Data Engineer and you've been testing a process that copies data from a few source systems to your Data Lakehouse using Pipelines, Dataflows and Notebooks in your Fabric "My Workspace". Your boss likes what you've done and wants the business to use what you have built. There are a few real-world problems you could run into from this point:
Your free trial is coming to an end, which means the items you have created in the Workspace have a countdown to being deleted.
You leave the organisation, and your account is deactivated. Over time, this is deleted and so is your Fabric workspace, meaning the background process driving reports mysteriously stops working.
You want to implement Source Control to the process you've built.
Power BI users will already be familiar with the interface and these challenges, but the range of features that you are able to create in Fabric extends this issue.
The ideal solution
Microsoft Fabric offers Deployment Pipelines to release content through environments using CICD principles. In a nutshell, users have the ability to create items in one workspace, and release it to other workspaces in a DevOps fashion.
However, you will notice that your "My Workspace" is missing from the drop down list as it is not allowed to be used within a deployment pipeline, so we need to use another approach.
The workaround to move items
Unfortunately, this is going to be mostly a copy-and-paste activity, but there are some tricks you can use to speed things up. I've found this relatively pain-free and the fix is more intuitive than digging around PowerShell scripts and REST APIs.
In my example of copying Data Engineering items across, you can access the code/metadata for pretty much everything with ease.
Dataflows: You have the M Code for each Query in the Advanced Editor. You can then create a new Dataflow, and simply insert this code.
Notebooks: You can multiple options to "Save as" directly to a new workspace, download as a a ipynb file, or copy the code directly.
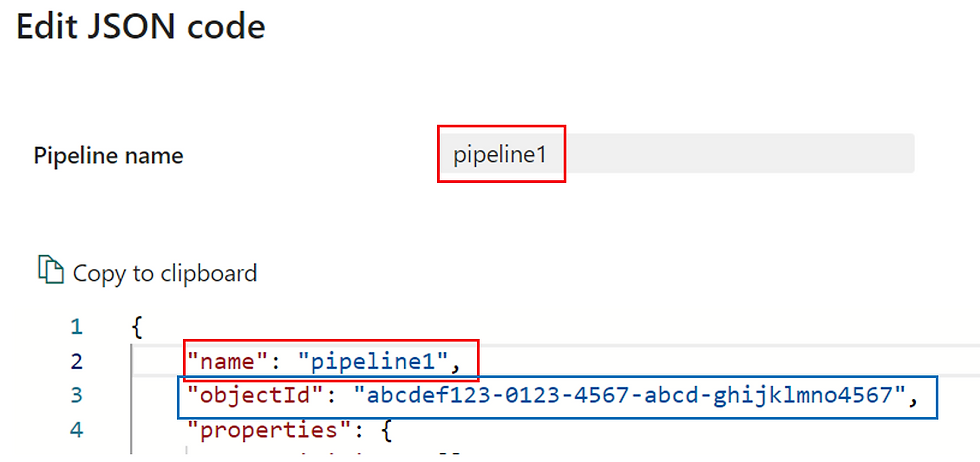
Data Pipelines: View and copy the underlying JSON code. When you create a new Pipeline, you can navigate to this button, and paste the code in (with a few caveats we shall discuss later).
Lakehouses: These need to be recreated manually unfortunately. You can write some SQL to copy data across if needed.
From here, I like to save all of these code artifacts locally to a folder so that I can keep track of what I need to move.
Before we can start the fun process of copying these across, think of the order in which to move things, given resource dependencies. For example, Pipelines execute Dataflows and Notebooks, therefore should be created afterwards. All items require access to the Lakehouse, so this needs to be created first.
With this thought in mind, my deployment process is as follows:
Create Lakehouse
Create Notebooks
Create Dataflows
Recursively create Pipelines from child Pipelines out to parent Pipelines
This process will save you some time between creating resources which reference others which do not yet exist, requiring you to flip between creation tasks.
This trivial example can be extended across the suite of products in Fabric, but there may be some considerations regarding the approach you need to take to copy the resources.
Gotchas to be aware of
Dataflows: Don't forget to set up your "Data Destination" once you've recreated the steps in the advanced editor!
Notebooks: If you "Save As" to a new workspace, the new notebook will actually reference the Lakehouse in "My Workspace". Be sure to update this reference.
Data Pipelines: Make sure your new pipeline has the same name as the previous one. The objectId you've copied is for the old pipeline object, so you must use the objectId found when you open the JSON of the new pipeline. I like to copy and paste only content from line 4 onwards to avoid this issue.
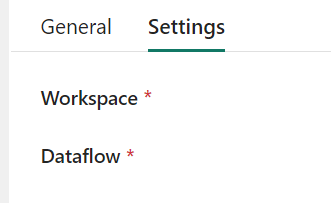
Similarly to Notebooks, all activities will reference the Fabric resources in "My Workspace", so you'll need to update these. Check the Workspace name for any activity like this.
Summary
While not ideal having to face this situation, this approach gives insight on some important considerations in designing and managing Fabric environments.
We can move items across to a new environment where we can begin to leverage things like DevOps and CICD via Deployment Pipelines.
We can also place items into shared Workspaces, where Administrators can set up access policies to control who is able to view and edit resources.
Understanding resource dependencies is important for smooth migrations.
As part of this, we have peaked into some cross-workspace configuration (by accident!) in the items themselves.
Thanks for reading!


Comments